I-Amazon SageMaker HyperPod is purpose-built to accelerate foundation model (FM) training, removing the undifferentiated heavy lifting involved in managing and optimizing a large training compute cluster. With SageMaker HyperPod, you can train FMs for weeks and months without disruption.
Typically, HyperPod clusters are used by multiple users: machine learning (ML) researchers, software engineers, data scientists, and cluster administrators. They edit their own files, run their own jobs, and want to avoid impacting each other’s work. To achieve this multi-user environment, you can take advantage of Linux’s user and group mechanism and statically create multiple users on each instance through lifecycle scripts. The drawback to this approach, however, is that user and group settings are duplicated across multiple instances in the cluster, making it difficult to configure them consistently on all instances, such as when a new team member joins.
To solve this pain point, we can use I-Lightweight Directory Access Protocol (LDAP) futhi LDAP over TLS/SSL (LDAPS) to integrate with a directory service such as AWS Directory Service for Microsoft Active Directory. With the directory service, you can centrally maintain users and groups, and their permissions.
In this post, we introduce a solution to integrate HyperPod clusters with AWS Managed Microsoft AD, and explain how to achieve a seamless multi-user login environment with a centrally maintained directory.
Ukubukwa kwesisombululo
The solution uses the following AWS services and resources:
Sisebenzisa futhi I-AWS CloudFormation to deploy a stack to create the prerequisites for the HyperPod cluster: VPC, subnets, security group, and Amazon FSx for Luster ivolumu.
Umdwebo olandelayo ubonisa isakhiwo sesisombululo sezinga eliphezulu.

In this solution, HyperPod cluster instances use the LDAPS protocol to connect to the AWS Managed Microsoft AD via an NLB. We use TLS termination by installing a certificate to the NLB. To configure LDAPS in HyperPod cluster instances, the lifecycle script installs and configures System Security Services Daemon (SSSD)—an open source client software for LDAP/LDAPS.
Okudingekayo
This post assumes you already know how to create a basic HyperPod cluster without SSSD. For more details on how to create HyperPod clusters, refer to Getting started with SageMaker HyperPod futhi HyperPod workshop.
Also, in the setup steps, you will use a Linux machine to generate a self-signed certificate and obtain an obfuscated password for the AD reader user. If you don’t have a Linux machine, you can create an EC2 Linux instance or use I-AWS CloudShell.
Create a VPC, subnets, and a security group
Landela imiyalelo ku- Own Account section of the HyperPod workshop. You will deploy a CloudFormation stack and create prerequisite resources such as VPC, subnets, security group, and FSx for Lustre volume. You need to create both a primary subnet and backup subnet when deploying the CloudFormation stack, because AWS Managed Microsoft AD requires at least two subnets with different Availability Zones.
In this post, for simplicity, we use the same VPC, subnets, and security group for both the HyperPod cluster and directory service. If you need to use different networks between the cluster and directory service, make sure security groups and route tables are configured so that they can communicate each other.
Create AWS Managed Microsoft AD on Directory Service
Complete the following steps to set up your directory:
- Use Directory Service console, khetha Izincwajana kufasitela lokuhambisa.
- Khetha Set up directory.
- Ukuze Directory type, khetha AWS Managed Microsoft AD.
- Khetha Olandelayo.

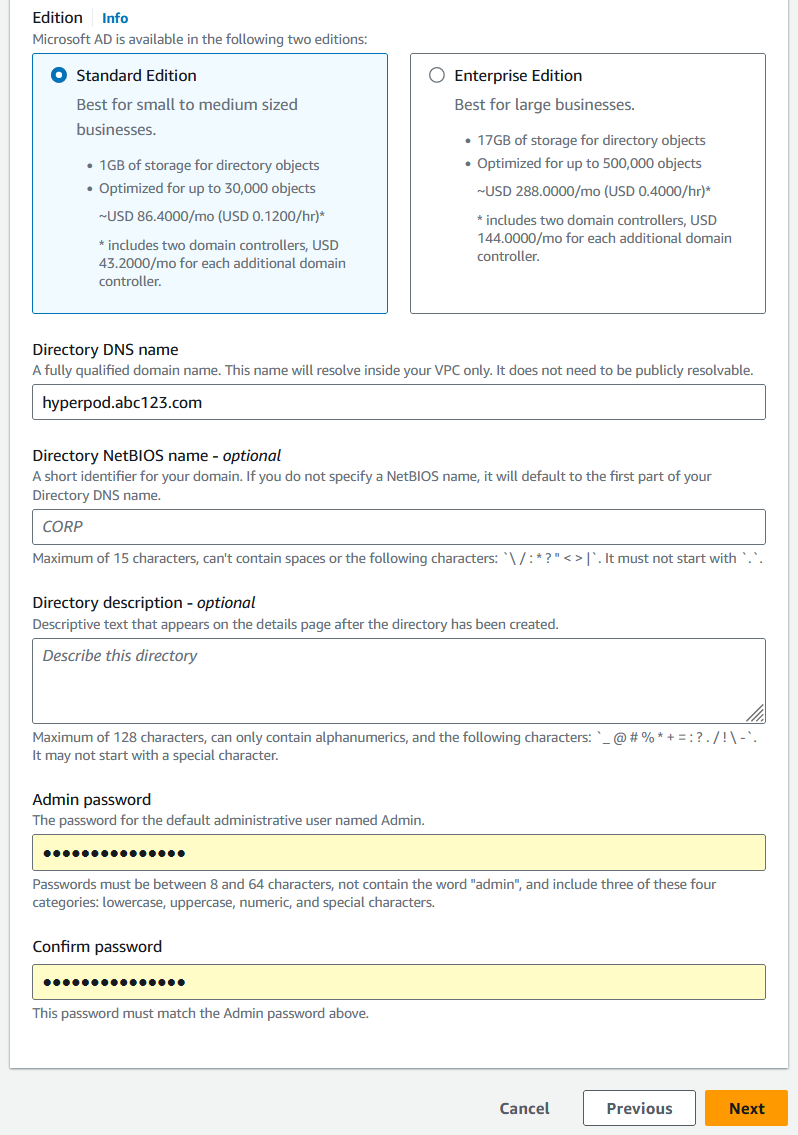
- Ukuze Edition, khetha Edition Standard.
- Ukuze Directory DNS name, enter your preferred directory DNS name (for example,
hyperpod.abc123.com). - Ukuze Iphasiwedi yomlawuli¸ set a password and save it for later use.
- Khetha Olandelayo.
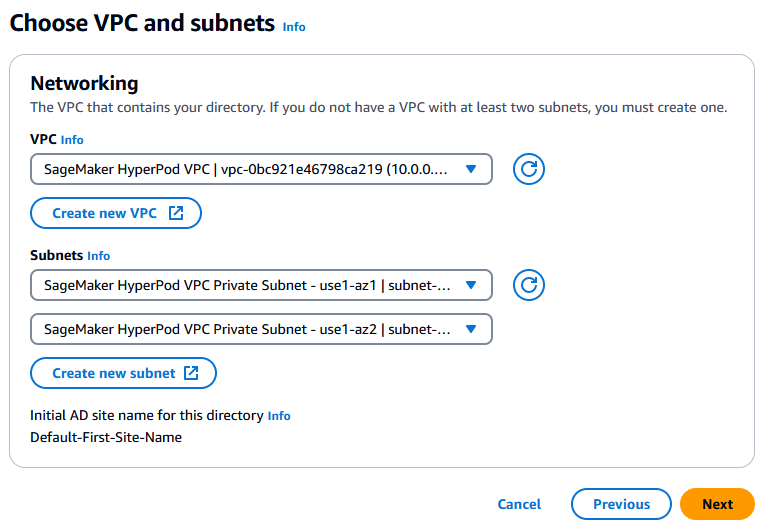
- In the Izingosi section, specify the VPC and two private subnets you created.
- Khetha Olandelayo.
- Review the configuration and pricing, then choose Create directory.

The directory creation starts. Wait until the status changes from Ukudala kuya Active, which can take 20–30 minutes. - When the status changes to Active, open the detail page of the directory and take note of the DNS addresses for later use.

Create an NLB in front of Directory Service
To create the NLB, complete the following steps:
- Use Amazon EC2 console, khetha Amaqembu okuqondiwe kufasitela lokuhambisa.
- Khetha Create target groups.
- Create a target group with the following parameters:
- Ukuze Choose a target type, khetha Amakheli e-IP.
- Ukuze Target group name, ngena
LDAP. - Ukuze Protocol: Port, khetha I-TCP bese ufaka
389. - Ukuze IP address type, khetha I-IPv4.
- Ukuze I-VPC, khetha SageMaker HyperPod VPC (which you created with the CloudFormation template).
- Ukuze Health check protocol, khetha I-TCP.
- Khetha Olandelayo.

- In the Register targets section, register the directory service’s DNS addresses as the targets.
- Ukuze Amaports, khetha Include as pending below.
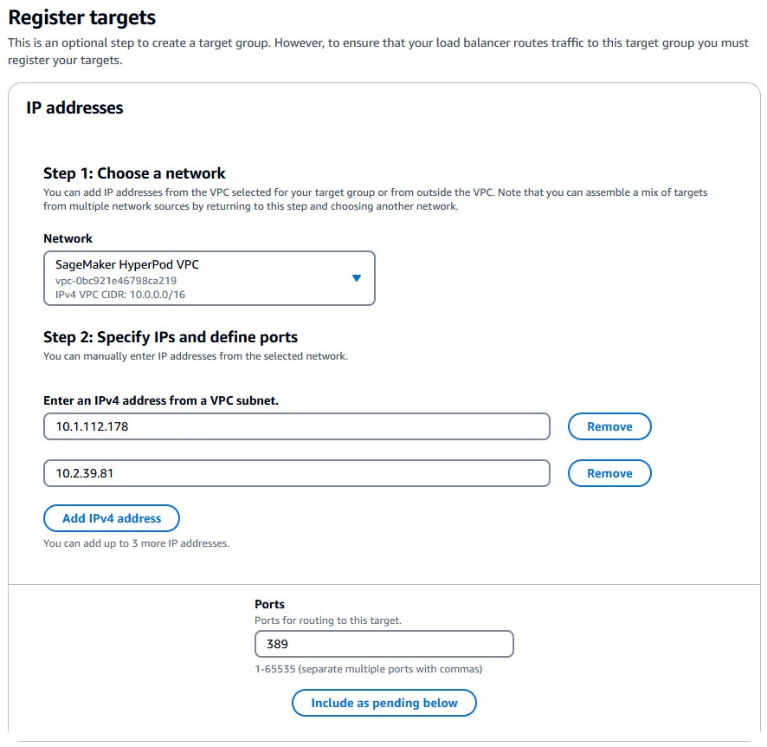 The addresses are added in the Review targets section with okulindile isimo.
 - Khetha Create target group.

- Use Load Balancers console, khetha Create load balancer.
- Ngaphansi Isilinganisi Somthwalo Wenethiwekhi, khetha Dala.

- Configure an NLB with the following parameters:
- Ukuze Layisha igama lebhalansi, faka igama (isibonelo,
nlb-ds). - Ukuze I-Scheme, khetha Ngaphakathi.
- Ukuze IP address type, khetha I-IPv4.

- Ukuze I-VPC, khetha SageMaker HyperPod VPC (which you created with the CloudFormation template).
- Ngaphansi Amamephu, select the two private subnets and their CIDR ranges (which you created with the CloudFormation template).
- Ukuze Amaqembu ezokuphepha, khetha
CfStackName-SecurityGroup-XYZXYZ(which you created with the CloudFormation template).
- Ukuze Layisha igama lebhalansi, faka igama (isibonelo,
- In the Listeners and routing section, specify the following parameters:
- Ukuze uHlelo Lokudlulisa, khetha I-TCP.
- Ukuze Port, ngena
389. - Ukuze Isenzo esizenzakalelayo, choose the target group named I-LDAP.
Here, we are adding a listener for LDAP. We will add LDAPS later.
- Khetha Create load balancer.
 Wait until the status changes from Ukuhlinzekela to Active, which can take 3–5 minutes.
 - When the status changes to Active, open the detail page of the provisioned NLB and take note of the DNS name (
xyzxyz.elb.region-name.amazonaws.com) for later use.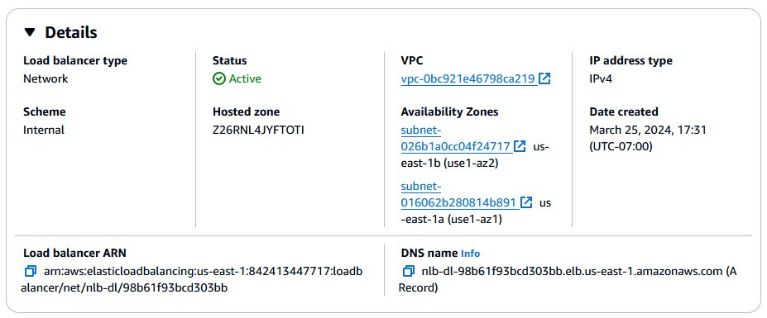
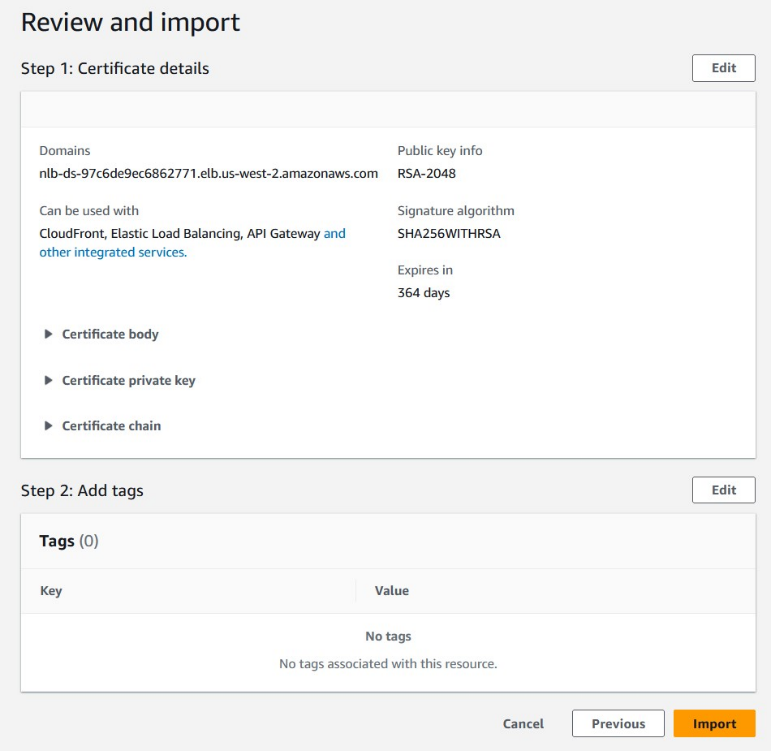
Create a self-signed certificate and import it to Certificate Manager
To create a self-signed certificate, complete the following steps:
- On your Linux-based environment (local laptop, EC2 Linux instance, or CloudShell), run the following I-OpenSSL commands to create a self-signed certificate and private key:
- Use Certificate Manager console, khetha Ngenisa.
- Enter the certificate body and private key, from the contents of
ldaps.crtfuthildaps.keyngokulandelana. - Khetha Olandelayo.

- Add any optional tags, then choose Olandelayo.

- Review the configuration and choose Ngenisa.
Add an LDAPS listener
We added a listener for LDAP already in the NLB. Now we add a listener for LDAPS with the imported certificate. Complete the following steps:
- Use Load Balancers console, navigate to the NLB details page.
- Use Abalaleli ithebhu, khetha Add listener.

- Configure the listener with the following parameters:
- Ukuze uHlelo Lokudlulisa, khetha TLS.
- Ukuze Port, ngena
636. - Ukuze Isenzo esizenzakalelayo, khetha I-LDAP.
- Ukuze Certificate source, khetha From ACM.
- Ukuze Certificate, enter what you imported in ACM.
- Khetha Engeza.
 Now the NLB listens to both LDAP and LDAPS. It is recommended to delete the LDAP listener because it transmits data without encryption, unlike LDAPS.
Create an EC2 Windows instance to administer users and groups in the AD
To create and maintain users and groups in the AD, complete the following steps:
- On the Amazon EC2 console, choose Izimo kufasitela lokuhambisa.
- Khetha Izehlakalo zokuqalisa.
- Ukuze Igama, enter a name for your instance.
- Ukuze Isithombe somshini we-Amazon, khetha Microsoft Windows Server 2022 Base.
- Ukuze Uhlobo lwesibonelo, khetha t2.micro.
- In the Izilungiselelo zenethiwekhi section, provide the following parameters:
- Ukuze I-VPC, khetha SageMaker HyperPod VPC (which you created with the CloudFormation template).
- Ukuze I-Subnet, choose either of two subnets you created with the CloudFormation template.
- Ukuze Common security groups, khetha
CfStackName-SecurityGroup-XYZXYZ(which you created with the CloudFormation template).
- Ukuze Configure storage, set storage to 30 GB gp2.
- In the Imininingwane ethuthukisiwe isigaba, kwe Domain join directory¸ choose the AD you created.
- Ukuze Iphrofayili yesibonelo ye-IAM, khetha i Ubunikazi be-AWS Nokuphathwa Kokufinyelela (IAM) role with at least the
AmazonSSMManagedEC2InstanceDefaultPolicyinqubomgomo. - Review the summary and choose Isibonelo sokuqalisa.
Create users and groups in AD using the EC2 Windows instance
With Ideskithophu Ekude, connect to the EC2 Windows instance you created in the previous step. Using an RDP client is recommended over using a browser-based Remote Desktop so that you can exchange the contents of the clipboard with your local machine using copy-paste operations. For more details about connecting to EC2 Windows instances, refer to Connect to your Windows instance.
If you are prompted for a login credential, use hyperpodAdmin (kuphi hyperpod is the first part of your directory DNS name) as the user name, and use the admin password you set to the directory service.
- When the Windows desktop screen opens, choose Isiphathi Sevava ukusuka Qala imenyu.

- Khetha Iseva Yendawo in the navigation pane, and confirm that the domain is what you specified to the directory service.

- Use Lawula imenyu, khetha Engeza Izindima nezici.

- Khetha Olandelayo until you are at the Izici ikhasi.

- Expand the feature Amathuluzi wokuPhatha we-Remote Server, wandise Role Administration Tools, bese ukhetha Amathuluzi e-AD DS kanye ne-AD LDS futhi Active Directory Rights Management Service.
- Khetha Olandelayo futhi ukufaka.
 Feature installation starts.
 - When the installation is complete, choose Close.

- Vula Ama-Active Directory Abasebenzisa Amakhompiyutha ukusuka Qala imenyu.

- Ngaphansi
hyperpod.abc123.com, wandisehyperpod. - Choose (right-click)
hyperpod, khetha New, bese ukhetha Iyunithi Yenhlangano.
- Create an organizational unit called
Groups.
- Choose (right-click) Amaqembu, khetha New, bese ukhetha Group.

- Create a group called
ClusterAdmin.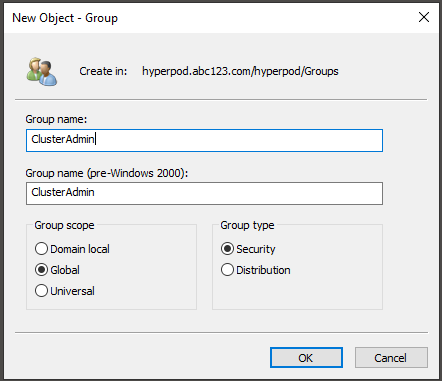
- Create a second group called
ClusterDev.
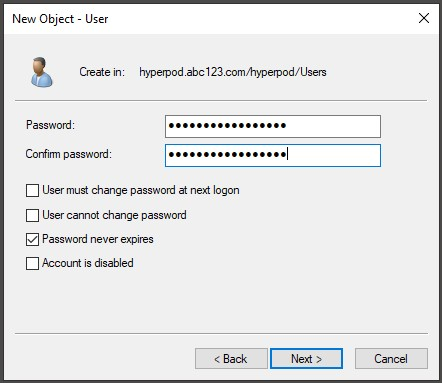
- Choose (right-click) Abasebenzisi, khetha New, bese ukhetha User.
- Dala umsebenzisi omusha.

- Choose (right-click) the user and choose Add to a group.

- Add your users to the groups
ClusterAdminorClusterDev. Users added to the
 ClusterAdmingroup will havesudoprivilege on the cluster.
Create a ReadOnly user in AD
Create a user called ReadOnly ngaphansi Users. The ReadOnly user is used by the cluster to programmatically access users and groups in AD.

Take note of the password for later use.
(For SSH public key authentication) Add SSH public keys to users
By storing an SSH public key to a user in AD, you can log in without entering a password. You can use an existing key pair, or you can create a new key pair with OpenSSH’s ssh-keygen command. For more information about generating a key pair, refer to Create a key pair for your Amazon EC2 instance.
- In Ama-Active Directory Abasebenzisa Amakhompiyutha, use Buka menu, enable Izici eziphambili.

- Vula Izakhiwo dialog of the user.
- Use Isibaluli Umhleli ithebhu, khetha
altSecurityIdentitieskhetha Hlela.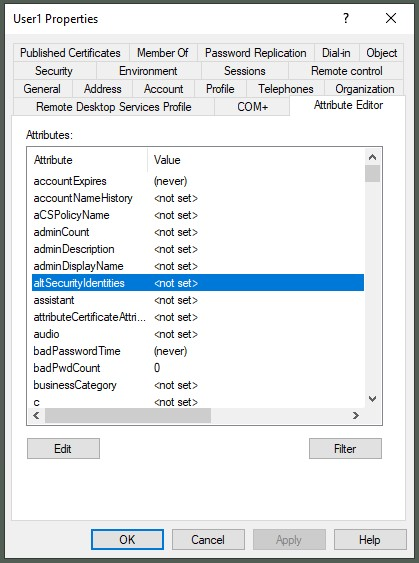
- Ukuze Value to add, khetha Engeza.
- Ukuze Izindinganiso, add an SSH public key.
- Khetha OK.
 Confirm that the SSH public key appears as an attribute.
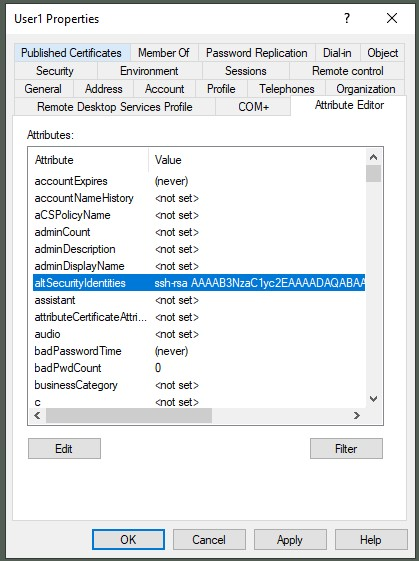
Get an obfuscated password for the ReadOnly user
To avoid including a plain text password in the SSSD configuration file, you obfuscate the password. For this step, you need a Linux environment (local laptop, EC2 Linux instance, or CloudShell).
Faka sssd-tools package on the Linux machine to install the Python module pysss for obfuscation:
Run the following one-line Python script. Input the password of the ReadOnly user. You will get the obfuscated password.
Create a HyperPod cluster with an SSSD-enabled lifecycle script
Next, you create a HyperPod cluster with LDAPS/Active Directory integration.
- Find the configuration file
config.pyin your lifecycle script directory, open it with your text editor, and edit the properties in theConfigikilasi kanyeSssdConfigisigaba:- Misa
Truengobaenable_sssdto enable setting up SSSD. - The
SssdConfigclass contains configuration parameters for SSSD. - Make sure you use the obfuscated password for the
ldap_default_authtokproperty, not a plain text password.
- Misa
- Copy the certificate file
ldaps.crtto the same directory (whereconfig.pyikhona). - Upload the modified lifecycle script files to your Isevisi ye-Amazon Simple Storage (Amazon S3) bucket, and create a HyperPod cluster with it.
- Wait until the status changes to InService.
Ukuqinisekiswa kwe-
Let’s verify the solution by logging in to the cluster with SSH. Because the cluster was created in a private subnet, you can’t directly SSH into the cluster from your local environment. You can choose from two options to connect to the cluster.
Option 1: SSH login through AWS Systems Manager
Ungasebenzisa Umphathi Wezinhlelo ze-AWS as a proxy for the SSH connection. Add a host entry to the SSH configuration file ~/.ssh/config using the following example. For the HostName field, specify the Systems Manger target name in the format of sagemaker-cluster:[cluster-id]_[instance-group-name]-[instance-id]. Okwe IdentityFile field, specify the file path to the user’s SSH private key. This field is not required if you chose password authentication.
Run the ssh command using the host name you specified. Confirm you can log in to the instance with the specified user.
At this point, users can still use the Systems Manager default shell session to log in to the cluster as ssm-user with administrative privileges. To block the default Systems Manager shell access and enforce SSH access, you can configure your IAM policy by referring to the following example:
For more details on how to enforce SSH access, refer to Start a session with a document by specifying the session documents in IAM policies.
Option 2: SSH login through bastion host
Another option to access the cluster is to use a i-bastion host as a proxy. You can use this option when the user doesn’t have permission to use Systems Manager sessions, or to troubleshoot when Systems Manager is not working.
- Create a bastion security group that allows inbound SSH access (TCP port 22) from your local environment.
- Update the security group for the cluster to allow inbound SSH access from the bastion security group.
- Create an EC2 Linux instance.
- Ukuze Isithombe somshini we-Amazon, khetha Ubuntu Server 20.04LTS.
- Ukuze Uhlobo lwesibonelo, khetha t3.small.
- In the Izilungiselelo zenethiwekhi section, provide the following parameters:
- Ukuze I-VPC, khetha SageMaker HyperPod VPC (which you created with the CloudFormation template).
- Ukuze I-Subnet, choose the public subnet you created with the CloudFormation template.
- Ukuze Common security groups, choose the bastion security group you created.
- Ukuze Configure storage, set storage to 8 GB.
- Identify the public IP address of the bastion host and the private IP address of the target instance (for example, the login node of the cluster), and add two host entries in the SSH config, by referring to the following example:
- Run the
sshcommand using the target host name you specified earlier, and confirm you can log in to the instance with the specified user:
Hlanza
Clean up the resources in the following order:
- Delete the HyperPod cluster.
- Delete the Network Load Balancer.
- Delete the load balancing target group.
- Delete the certificate imported to Certificate Manager.
- Delete the EC2 Windows instance.
- Delete the EC2 Linux instance for the bastion host.
- Delete the AWS Managed Microsoft AD.
- Delete the CloudFormation stack for the VPC, subnets, security group, and FSx for Lustre volume.
Isiphetho
This post provided steps to create a HyperPod cluster integrated with Active Directory. This solution removes the hassle of user maintenance on large-scale clusters and allows you to manage users and groups centrally in one place.
For more information about HyperPod, check out the HyperPod workshop futhi SageMaker HyperPod Developer Guide. Leave your feedback on this solution in the comments section.
Mayelana Ababhali
 Tomonori Shimomura is a Senior Solutions Architect on the Amazon SageMaker team, where he provides in-depth technical consultation to SageMaker customers and suggests product improvements to the product team. Before joining Amazon, he worked on the design and development of embedded software for video game consoles, and now he leverages his in-depth skills in Cloud side technology. In his free time, he enjoys playing video games, reading books, and writing software.
 Giuseppe Angelo Porcelli ungumakhi Oyinhloko Wezixazululo Zokufunda Ngomshini Wokuklama Wezinsizakalo Zewebhu ze-Amazon. Ngeminyaka eminingana yobunjiniyela besofthiwe kanye nesizinda se-ML, usebenza namakhasimende anoma yimuphi usayizi ukuze aqonde izidingo zabo zebhizinisi nezobuchwepheshe futhi aklame izixazululo ze-AI ne-ML ezisebenzisa kahle kakhulu i-AWS Cloud kanye ne-Amazon Machine Learning stack. Usebenze kumaphrojekthi ezizindeni ezahlukene, okuhlanganisa i-MLOps, umbono wekhompyutha, kanye ne-NLP, efaka isethi ebanzi yezinsizakalo ze-AWS. Ngesikhathi sakhe samahhala, uGiuseppe uthanda ukudlala ibhola.
 Monidipa Chakraborty currently serves as a Senior Software Development Engineer at Amazon Web Services (AWS), specifically within the SageMaker HyperPod team. She is committed to assisting customers by designing and implementing robust and scalable systems that demonstrate operational excellence. Bringing nearly a decade of software development experience, Monidipa has contributed to various sectors within Amazon, including Video, Retail, Amazon Go, and AWS SageMaker.
 Satish Pasumarthi is a Software Developer at Amazon Web Services. With several years of software engineering and an ML background, he loves to bridge the gap between the ML and systems and is passionate to build systems that make large scale model training possible. He has worked on projects in a variety of domains, including Machine Learning frameworks, model benchmarking, building hyperpod beta involving a broad set of AWS services. In his free time, Satish enjoys playing badminton.
- I-SEO Powered Content & PR Distribution. Khuliswa Namuhla.
- I-PlatoData.Network Vertical Generative Ai. Zinike Amandla. Finyelela Lapha.
- I-PlatoAiStream. I-Web3 Intelligence. Ulwazi Lukhulisiwe. Finyelela Lapha.
- I-PlatoESG. Ikhabhoni, I-CleanTech, Amandla, Environment, Ilanga, Ukuphathwa Kwemfucuza. Finyelela Lapha.
- I-PlatoHealth. I-Biotech kanye ne-Clinical Trials Intelligence. Finyelela Lapha.
- Source: https://aws.amazon.com/blogs/machine-learning/integrate-hyperpod-clusters-with-active-directory-for-seamless-multi-user-login/

