Staking is one of the most fundamental and essential elements of blockchain design. The process entails network users locking up a certain amount of their cryptocurrency holdings to support the blockchain’s operation. It’s how Proof of Stake (PoS) blockchains such as Avalanche are secured and entails validators being chosen to create new blocks based on the number of coins they hold and are willing to stake as collateral.
The staking process involves actively participating in the Proof-of-Stake (PoS) consensus mechanism, which is an alternative to the Proof-of-Work (PoW) used with first-generation cryptocurrencies like Bitcoin. In return for locking their assets into a smart contract, to participate in network consensus, the staker receives the native asset in return. This is the reward that incentivizes staking and ensures PoS networks are secure and decentralized.
In this guide, we’ll detail how to participate in AVAX staking using one of the most popular non-custodial wallets, Core, as an example. But first, let’s consider what staking entails and the most common staking options available to crypto holders.
There’s More Than One Way to Stake
From Etheurem to Avalanche and Solana to Sei, the vast majority of second and third-generation blockchains utilize Proof of Stake. While the process works in a similar manner from chain to chain, the way in which stakers can participate in the process differs. It turns out there’s more than one way to stake a blockchain’s native token and participate in the network validation process.
There are a number of reasons for this. One concerns the fact that while many holders of a native asset such as AVAX may wish to participate in staking and receive their share of the rewards, they may have no interest in running a validator node. It requires dedicated hardware, a degree of technical knowledge, and the ability to maintain uptime 24/7.
Thankfully, there’s a simple solution to this problem: delegated staking, whereby the user stakes their assets with a third party who will operate a node on their behalf and share the rewards. This is how the majority of users participate in staking on chains such as Ethereum, EOS, and Avalanche. But even within the context of delegated staking, there are a number of choices available, starting with a binary option: centralized or decentralized?
The Pros and Cons of Keeping It Custodial
The explosion in PoS blockchains has caused the number of staking services to rocket. It is great from the end user’s perspective, as staking can now be undertaken – and the subsequent rewards collected – in a couple of clicks. However, it’s important to distinguish between custodial and non-custodial staking.
Many centralized exchanges offer staking for Layer-1 blockchains, but they retain custody of the assets. That means you have no recourse in the event of the exchange failing or being hacked. Exchanges also typically charge higher fees in return for the convenience they provide by automating the service. On account of these reasons, centralized staking is not recommended when using “life-changing” amounts of cryptocurrency.
If you hold a few AVAX on an exchange and want to stake it using an integrated staking service, do so. Yet, you aren’t truly participating in blockchain staking until you do so with a service that allows you to retain custody of your assets and the ability to unilaterally withdraw them. It is at the heart of blockchain’s entire value proposition.
The Best Way to Stake AVAX
The best way to stake a native asset such as AVAX, in the case of Avalanche, is through a non-custodial solution such as a dedicated wallet. We’ll use Core as an example here since it’s one of the most popular Avalanche wallets, but the same procedure can be applied to other wallets and protocols that support AVAX staking.
Core is available on mobile, web, and as a browser extension. In this guide, we’ll use the latter option. After creating a Core wallet and authenticating using your desired method, such as Google, visit Core’s staking portal and connect your wallet when prompted.
AVAX Staking With Core
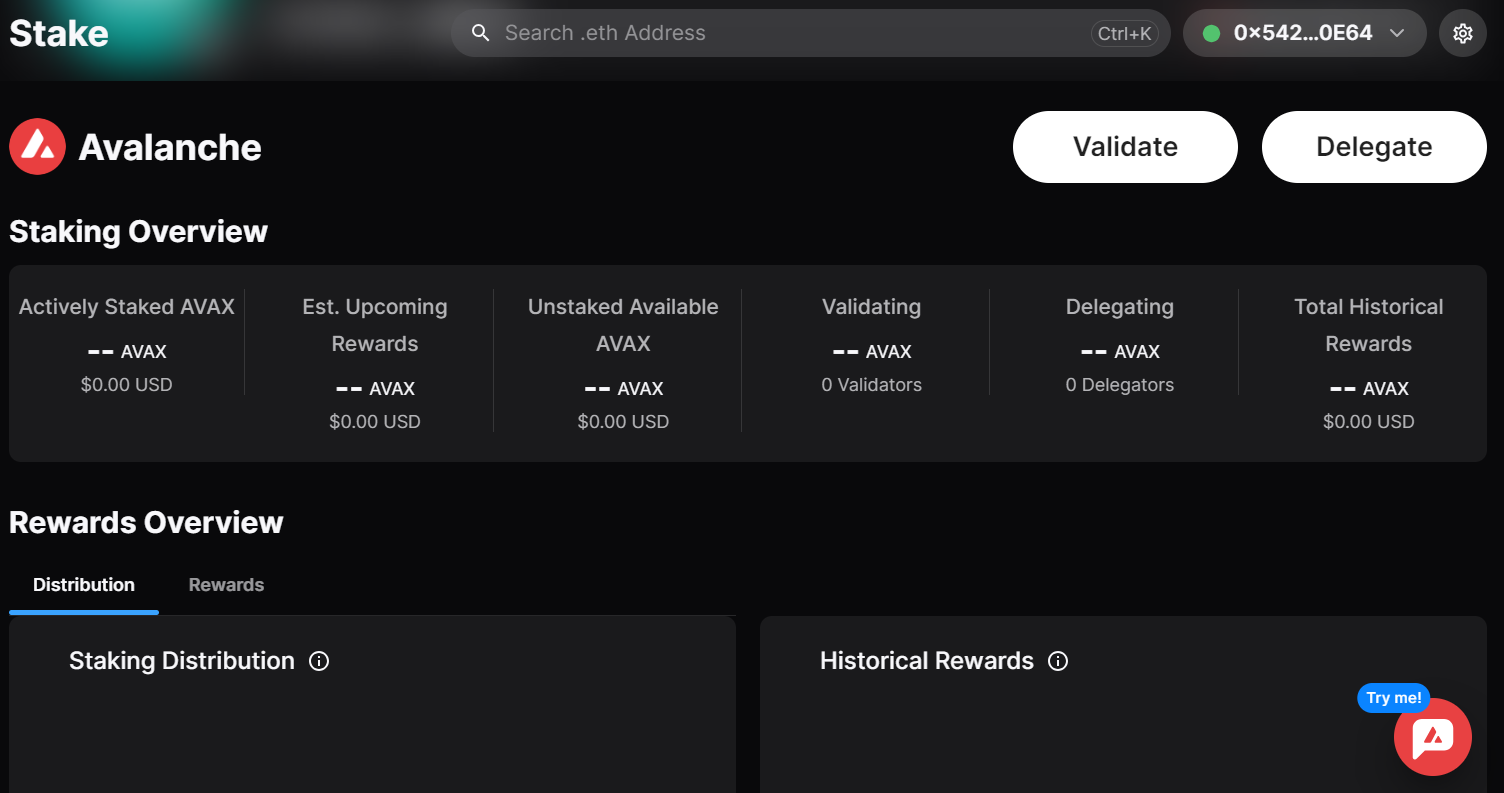
On the Staking page, you’ll see two options available: Validate and Delegate. As explained earlier, delegation is the most common means of staking, since it’s user-friendly, simple, and doesn’t require specialist knowledge. Select Delegate and, as Core explains, this “enables you to delegate without the need to operate your own validator node. Instead, you can delegate your tokens to a validator and receive rewards for staking and locking your tokens, minus a fee retained by the validator.”
Select “Get Started” and you’ll be informed that a minimum of 25 AVAX is required. With Avalanche, staking takes place on the P-Chain, while your tokens normally reside on the EVM-compatible C-Chain. Select “Transfer AVAX” if you need to deposit tokens to the P-Chain and then “Approve Transfer.”

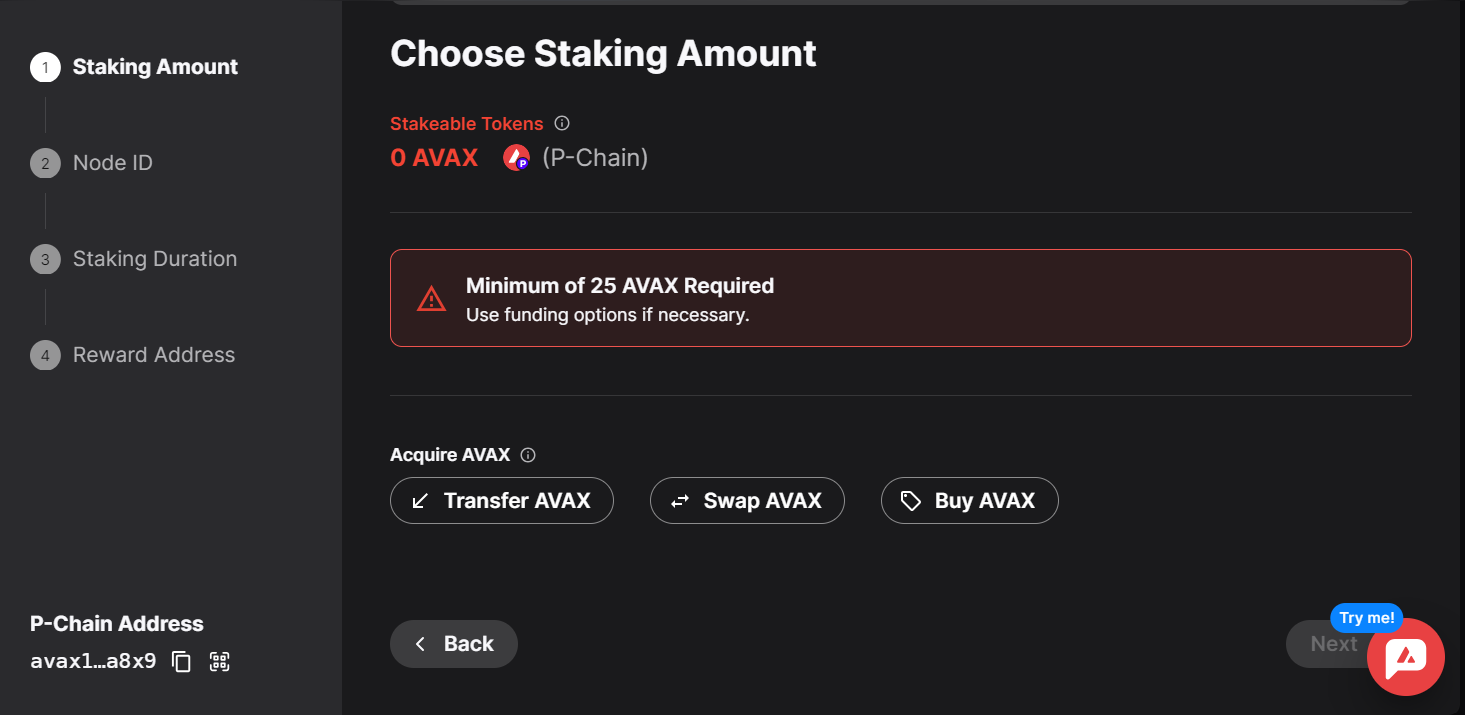
Core will prompt you to sign the transaction and then you’ll receive a notification informing you of the successful transfer. Now select “Back” and you’ll return to the Delegate page. You can now select the amount you wish to stake. Remember to leave a small amount of AVAX in your wallet to cover gas. Enter your desired stake amount and hit “Next.”

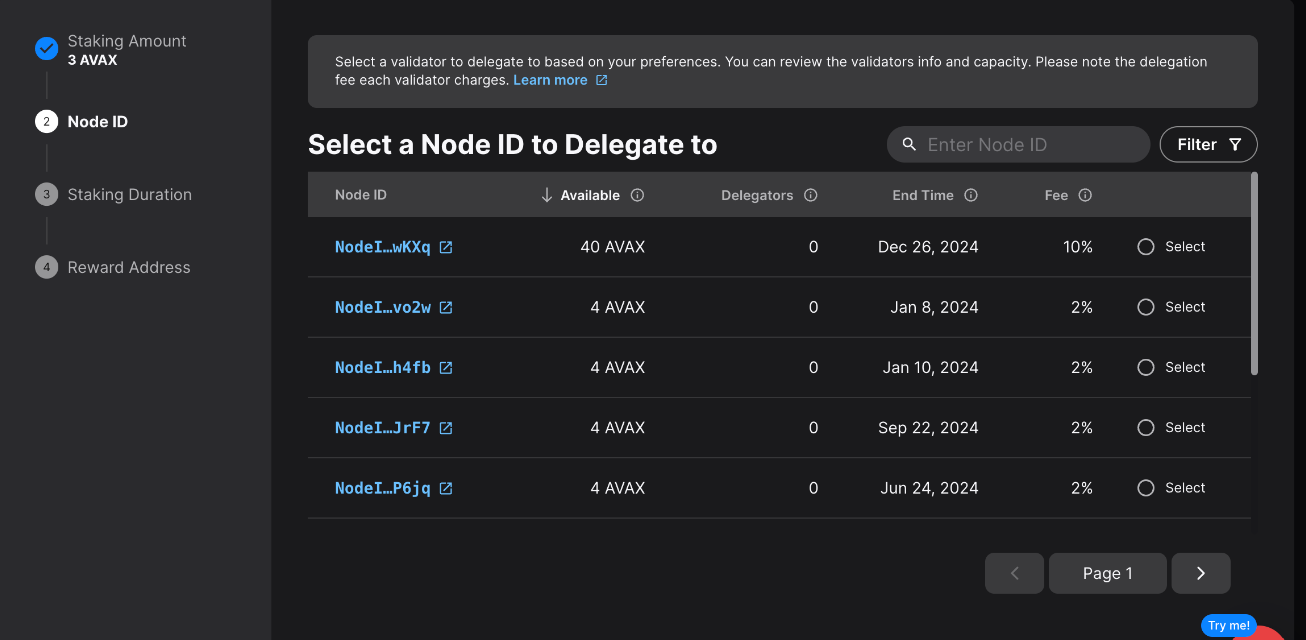
Finally, select a node to delegate to. Core displays details for each of the available validators including the fee each collects. By default, this is set to 2%. Choose a node ID from the list available and again click “Next.” Now select the staking duration; the minimum is 14 days. You will then be prompted to choose which Avalanche wallet address you want the staking rewards to be paid into. You’re best selecting your current Core wallet address.
You’ll now be taken to a summary page detailing the staking particulars you’ve selected. Check them over to make sure everything’s to your liking and, when you’re happy, select “Submit Delegation.” That’s it, you’re now staking AVAX on Avalanche P-Chain while retaining full control over your assets. When the staking period has completed, you can withdraw your AVAX or restake it, while continuing to collect your rewards.

Although there are a few steps to staking on Avalanche using a wallet such as Core, these are easy to follow and quick to complete. In just a few clicks, you’ll be up and running and able to support network security while collecting AVAX rewards.
- SEO Powered Content & PR Distribution. Get Amplified Today.
- PlatoData.Network Vertical Generative Ai. Empower Yourself. Access Here.
- PlatoAiStream. Web3 Intelligence. Knowledge Amplified. Access Here.
- PlatoESG. Carbon, CleanTech, Energy, Environment, Solar, Waste Management. Access Here.
- PlatoHealth. Biotech and Clinical Trials Intelligence. Access Here.
- Source: https://thenewscrypto.com/the-best-way-to-stake-avax-with-step-by-step-guide-on-how-to-do-so/

